
How to Upscale Video with AI: From 480p to 4K Step-by-Step
Table of Contents
- What AI Video Upscaling Actually Does (And the Math It Can't Cheat)
- Browser, Desktop, or Cloud — Picking the Right AI Video Upscaler
- Pre-Upscale Prep — Source File Decisions That Make or Break the Output
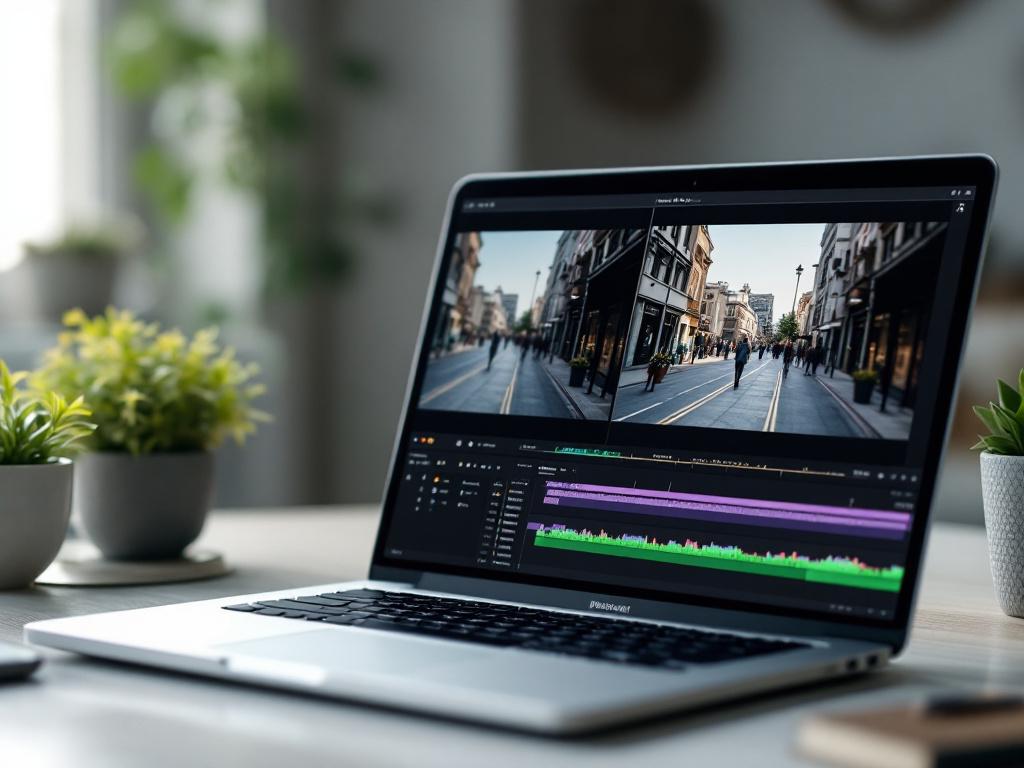
- Step-by-Step — Upscaling a Video in the Browser
- How to Tell a Good Upscale from a Bad One
- Advanced Workflow Tips — Mistakes That Quietly Cost You Quality
You open the project folder a client sent over and there it is — 480p footage from a 2019 brand shoot, dropped into a 4K timeline that needs to deliver next week. Resizing it inside the editor produces a soft, plasticky mess. Replacing the footage isn't an option. The original camera files are gone. You have what you have, and the deadline is the deadline.
This is the situation where AI video upscale tools either save your edit or make it worse. Three decisions determine which way it goes: the quality of your source file, the model and tool you pick, and how aggressive a resolution jump you ask the model to make. Get those three right and the result can pass for native 1080p or 4K capture in most viewing contexts. Get them wrong and you'll deliver waxy faces, flickering backgrounds, and signage that no longer matches what was actually shot.
What follows is a working process — the conceptual ground a video editor needs, the trade-offs between browser, desktop, and cloud upscalers, a step-by-step walkthrough using a browser-based local tool, and a five-zone evaluation framework for telling a good upscale from a bad one.
What AI Video Upscaling Actually Does (And the Math It Can't Cheat)
Before the tool choice matters, the math matters. Traditional upscalers — bilinear, bicubic, nearest-neighbor — are interpolation algorithms. They compute new pixels by averaging neighboring pixels (bilinear, bicubic) or by copying the nearest existing pixel (nearest-neighbor). When you stretch a 480p frame to 4K with these methods, you end up with the same information distributed across roughly nine times more pixels. No new detail enters the image. The result is either soft (averaging) or blocky (copying). Think of zooming into a JPEG inside a basic image viewer — the picture grows, the detail does not.
AI super-resolution works on a different principle. The model is trained on millions of paired image samples — a low-resolution version and a corresponding high-resolution version of the same scene. Across that training, the network learns statistical patterns: what a sharp eyelash typically looks like given a blurry input, what a sharp brick edge tends to resemble, how a leaf's veins commonly appear when the source is soft. At inference time — when you process your video — the model predicts plausible high-frequency detail based on those learned patterns. The word "reconstruct" gets used a lot, and it deserves a qualifier. The model is not recovering the original detail that was captured by the lens. It is generating probable detail that resembles what the high-resolution training data contained. Most current vendor offerings describe their models in roughly these terms.
That distinction defines the limits of what any AI video upscale tool can do. There are three constraints worth being blunt about.
No source detail means no reconstruction. A face that has been blurred down to a flesh-colored oval — three or four pixels wide — will not become a recognizable face in the upscaled output. The model will invent plausible features (an eye-shaped region here, a nose-shaped shadow there), not correct ones. If correctness matters — documentary, archival, legal evidence — this is a hard ceiling.
Compression artifacts compound. Heavily compressed H.264 source — low bitrate, blocky shadows, mosquito noise around edges — gives the model corrupt input. The model has been trained to treat sharp transitions as features. It will treat compression blocks as features too, and amplify them. The output looks more "detailed" but the detail is a magnified version of the codec's failures.
Motion is harder than stills. Frame-to-frame consistency requires temporal coherence — the model has to make the same plausible decisions across consecutive frames so that a brick wall does not subtly change texture as a subject walks past it. Cheaper or faster models often skip or approximate the temporal pass, and the result is flickering: reconstructed detail that shifts between frames in a way the eye reads as wrong.
Source codec and bitrate matter for the same reason. ProRes, DNxHD, and lossless intermediates preserve far more luminance and chroma information than a 10 Mbps H.264 export. If you are upscaling from a 480p YouTube download, you are working with a re-compressed copy of a re-compressed copy. The visible image looks fine to your eye, but the model sees every quantization decision the codec made, and it propagates them into the output. When the original camera file or master export still exists on a hard drive somewhere, use it — even if it's larger and slower to process.
A realistic ceiling, given all of this: a clean 1080p source upscales beautifully to 4K. A 480p VHS rip upscales acceptably to 1080p. A heavily compressed 240p clip pushed to 8K will look like AI-generated mush, because the model is being asked to invent more than 95% of the output pixels from almost no real information. The bigger the resolution jump, the more the model is guessing — and the more visible the guesswork becomes in the final frame.
AI upscaling does not invent detail from nothing. It reconstructs probable high-frequency information from patterns learned on millions of high-res image pairs. Your source quality is the ceiling, not your tool.
Browser, Desktop, or Cloud — Picking the Right AI Video Upscaler
The category of tool you choose determines your privacy posture, your hardware burden, your speed, and your ongoing cost. There are three real options, and the right answer depends on which factor you weight highest.
| Factor | Browser-Based (Local WebAssembly) | Desktop AI Software | Cloud Platform |
|---|---|---|---|
| File handling | Files never leave device | Files stay on device | Files uploaded to vendor server |
| Setup required | None — open URL | Download, install, license | Account, often payment |
| Hardware burden | Uses your CPU/GPU via browser | Uses your CPU/GPU directly | Uses vendor's GPU |
| Speed on weak hardware | Slower | Slower | Fast (offloaded) |
| Speed on strong GPU | Moderate | Fastest | Fast |
| Typical cost | Free | $30–$300 one-time or subscription | Subscription or per-minute credits |
| Best for sensitive footage | Yes — local processing | Yes — local processing | No — third party sees content |
Cost ranges and speed claims in this table reflect product-page descriptions from category vendors (Topaz Labs, Magnific, Canva, TensorPix, WinX). Independent head-to-head benchmarks across these tools are not currently available, so treat speed comparisons as directional, not precise.
Start with the privacy lens. Writers, journalists, legal teams, medical-content producers, and anyone handling pre-release client footage have a hard reason to keep files off third-party servers. Browser-based tools using WebAssembly — FFmpeg compiled to run inside the browser — process the file on your own device. The video never uploads. Desktop software does the same with a download-and-install commitment up front. Cloud platforms push the file to a vendor's GPU cluster, which is faster but means trusting that vendor's data handling policies, retention windows, and breach posture. For a one-off 480p archival clip you found on a public website, that trade-off is trivial. For a client's unreleased product launch footage, it is not.
Then the speed lens. Cloud platforms generally win on raw processing time when source files are large and your local hardware is modest. A laptop without a discrete GPU will struggle with 4K upscaling regardless of whether the tool runs in a browser or as a native app — the model still needs the silicon. Cloud upscaling moves that burden to remote infrastructure, which is the pragmatic choice when your machine is the bottleneck and the content is not sensitive.
Then the cost lens. Browser-based tools tend to be free, watermark-free, and registration-free. Desktop tools span from one-time purchases at the lower end (around $30) to professional-tier subscriptions at the higher end. Cloud platforms typically charge per minute of processed video or per credit, which adds up quickly for long-form content like documentaries, lectures, or full-episode upscales.
A practical decision framework, not a single answer:
- Sensitive content + occasional use → browser-based local processing
- Daily professional pipeline + powerful workstation → desktop software
- Large batch jobs + non-sensitive content + willingness to pay → cloud
- Fast turnaround + weak laptop + acceptable privacy risk → cloud
If you're preparing the source clip — trimming heads and tails, isolating the segment that needs upscaling, splitting a long file into manageable chunks — doing that step inside browser-based video tools keeps the entire workflow local before you commit to an upscaler. That matters because every transcoding generation degrades the source slightly, and shorter clips process faster regardless of which upscaling category you ultimately pick.
Pre-Upscale Prep — Source File Decisions That Make or Break the Output
Output quality is largely determined before you click "process." The next seven steps are unglamorous and they matter more than which model you pick.
- Locate the highest-quality source you have access to. If the original camera file, master export, or ProRes/DNxHD intermediate exists, use it. Do not upscale a re-exported H.264 copy when the original is sitting on a hard drive — every compression generation degrades input quality, and the model amplifies what it sees.
- Verify resolution, codec, and bitrate before processing. Right-click the file → Properties (Windows), Get Info (macOS), or open it in MediaInfo (free, cross-platform). Note resolution, codec (H.264, H.265, ProRes), bitrate in Mbps, and frame rate. These four numbers determine your realistic upscale targets.
- Choose a realistic target resolution. 480p → 1080p (a 2.25× linear jump, roughly 5× the pixel count) and 1080p → 4K (a 4× linear jump, 16× the pixel count when you account for both dimensions) are well-tested ranges. 480p → 8K is theoretically possible but the model is guessing across far more pixels than the source contains, and the result reads as artificial.
- Deinterlace if the source is interlaced. Older broadcast and DV footage often uses interlaced fields rather than progressive frames. Upscaling interlaced content directly produces combing artifacts — horizontal lines on moving objects. Run a deinterlace pass first using your video editor or FFmpeg's
yadiffilter. - Trim dead space before processing. Upscaling time scales linearly with frame count. A 30-minute clip with 5 minutes of black leader at the start wastes processing time and produces a larger output file. Trim the clip first, then send only the segment you need.
- Cut a 10-second test segment. Before committing to a 30-minute upscale, run a short representative clip — one that contains motion, faces, and fine detail — through the same settings. Evaluate, then commit. This is the single highest-leverage habit in the entire workflow.
- Match the input codec to the tool's strengths. H.264 is the broadest-compatible input format. H.265/HEVC may decode slower depending on the tool. ProRes input is usually the cleanest but produces larger intermediate files; if the upscaler accepts it, use it.
Three of those steps deserve reinforcement because they carry the most weight.
Source quality is the entire ceiling. A user who upscales a YouTube-downloaded 480p clip will get worse results than a user who upscales a 480p ProRes master, even with identical tool settings. The compression generations are not visible to the eye when you watch the source at native resolution, but the model sees them — every macroblock boundary, every quantization step — and it amplifies them on output.
The resolution jump determines hallucination risk. 2× and 4× upscales are well-trained territory for most modern models. 8× and beyond push the model into territory where it must invent the majority of the output pixels. The result becomes more "AI-generated" than "AI-enhanced," and human viewers — even untrained ones — usually sense the difference even when they can't articulate it.
The test clip is non-negotiable. Processing time for 4K upscaling can run from a couple of minutes per minute of footage on strong hardware to several hours per minute on weak hardware. Discovering that your settings produced waxy faces after a four-hour render is avoidable. Ten seconds of test footage will reveal motion artifacts, color shifts, and over-sharpening in roughly two minutes of processing. There is no workflow reason to skip this step.
One adjacent note: if your source has audio that needs separate handling — a podcast-style interview where you want to clean up the audio independently of the video, or footage where you need to mute or replace a section — handle the audio before upscaling using a dedicated online audio cutter. Some upscalers strip or re-encode audio in ways that subtly change quality, and routing audio through a dedicated audio path avoids that risk.
Processing time is non-negotiable physics. Upscaling 480p to 4K means generating sixteen times more pixels than the source contains. Test with a ten-second clip before committing your archive footage to an overnight render.
Step-by-Step — Upscaling a Video in the Browser
What follows is a concrete walkthrough using a browser-based local tool. The same pattern applies to desktop and cloud workflows, but the browser version is the lowest-friction starting point, especially for a first test.
Step 1 — Open the tool and load your source file.
Navigate to the upscaling tool in your browser. Drag the prepared source file onto the upload area or use the file picker. Confirm the format is recognized — most browser-based upscalers support MP4, MOV, MKV, and WebM. If your file is ProRes or another professional intermediate that the browser tool does not support, transcode to high-bitrate H.264 first (50+ Mbps for 1080p source) to preserve detail before processing. Do not transcode to a low-bitrate H.264 to "save space" — you will throw away the very detail you're about to ask the model to enhance.

Step 2 — Select the upscaling model.
Most tools offer a choice between conservative and aggressive models. Conservative models — sometimes labeled "general," "balanced," or "natural" — add modest detail and preserve the source's look. Aggressive models — labeled "enhanced," "detail-boost," or "AI sharpening" — invent more synthetic detail. Aggressive models help with very soft sources but risk plastic skin and invented features when applied to footage with faces. Default to conservative for anything with people in frame. Default to aggressive for landscape, architecture, product shots, or graphics-heavy content where the cost of invented detail is lower.
Step 3 — Set the target resolution.
Choose your output dimensions. If your source is 1080p, choose 4K (3840×2160). If your source is 480p, choose 1080p first, evaluate the result, and only then decide whether 4K is justified. Resist the temptation to jump straight to 8K — the marginal gain rarely justifies the processing time, the file size, or the artifact risk. A 4K master can always be downscaled to 1080p with no quality loss; an 8K master with hallucinated detail cannot be repaired.
Step 4 — Configure the output codec and bitrate.
For sharing or web upload, choose H.264 at 50+ Mbps for 4K, 25+ Mbps for 1080p. For continued editing in a professional NLE, choose H.265 (smaller file, higher CPU load on playback) or, if available, an intermediate codec like ProRes. Low-bitrate H.264 output will undo the upscaler's work — the compressor will throw away the very high-frequency detail the model just generated. This is one of the most common silent failures in the workflow: the upscale processed correctly, but the export settings discarded the result.

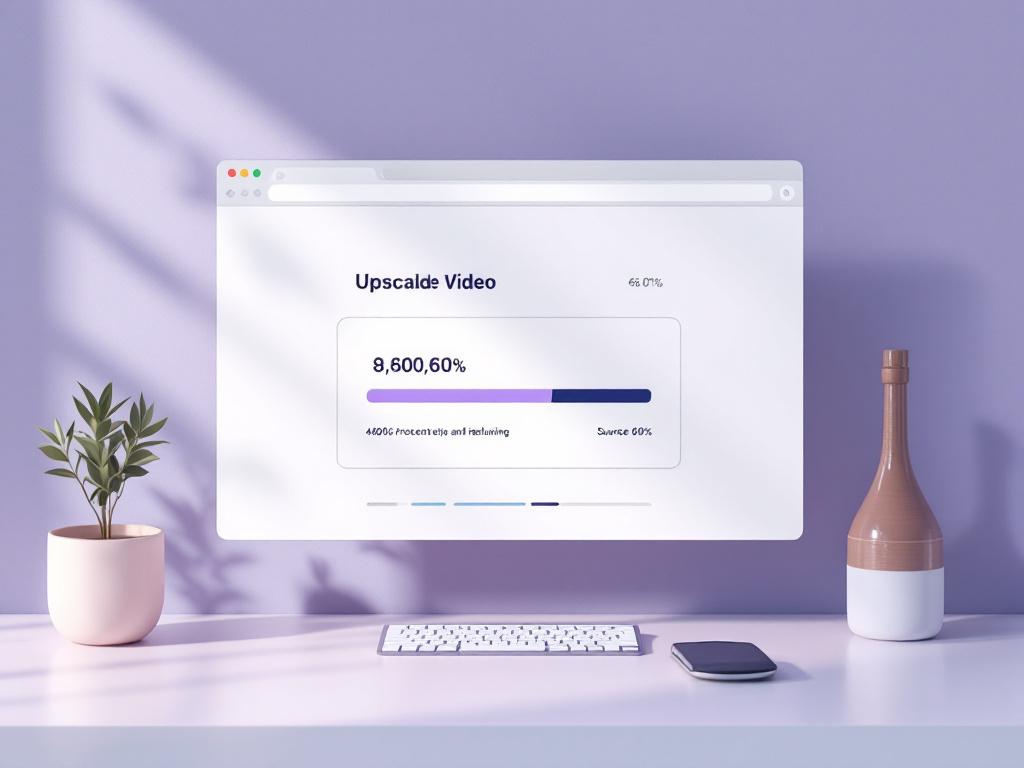
Step 5 — Start processing and monitor progress.
Click process. The browser will show a progress bar and time estimate. On a mid-range laptop, expect roughly 2–10 minutes per minute of 1080p output, longer for 4K. Keep the browser tab active — most browsers throttle background tabs aggressively, which slows or pauses GPU-heavy work. Avoid running other GPU-heavy applications during processing (games, other video editors, 3D software, machine-learning workloads). If you're processing a long file on a laptop, plug it in. Battery-saver power profiles will cap GPU clock speeds.
Step 6 — Download and verify.
When processing completes, download the file directly to your device. Browser-based tools do not store the output on their end — once you close the tab, it's gone. Open the downloaded file in a video player and skim through. Pause on a face, on a moving object, and on text or signage. These are the three quickest sanity checks for upscale quality. If anything looks wrong, return to Step 2 with a different model or a smaller resolution jump and rerun your 10-second test clip. Do not rerun the full file until the test passes.
How to Tell a Good Upscale from a Bad One
Some hallucination is the point. The model is supposed to add plausible detail — that's why you're using it instead of bicubic interpolation. The question is whether the additions look natural or synthetic. Good upscales add fine texture, sharpen edges believably, and preserve the source's mood and color. Bad upscales produce waxy skin, invented text, color shifts, motion stuttering, or detail that flickers between frames.
Frame the evaluation as a five-zone check on each test clip: faces, fast motion, fine detail (hair, fabric, foliage), text or signage, and dark or shadow areas. These five zones expose the most common failure modes. A clip that passes all five is releasable. A clip that fails on faces or motion needs a rerun with different settings — a more conservative model, a smaller resolution jump, or both.
Evaluate at 100% zoom on the actual delivery device, not at fit-to-window in a preview. A 4K upscale viewed at 25% zoom on a laptop screen will hide artifacts that become obvious on a 4K monitor or on a client's TV during the screening. The artifacts have not gone away — your viewing context has just made them invisible to you, and they will reappear the moment someone else watches it on a real display.
The eight specific things to look for:
- Edge sharpness without halos. Edges should be crisp but not outlined by visible ringing or bright halos. Halos — a faint glow on one or both sides of a high-contrast edge — indicate over-sharpening. Pull back to a more conservative model.
- Skin that looks like skin, not wax. Faces are the highest-stakes test. Pores, fine hair, and subtle shadows should remain visible. If skin looks airbrushed or plastic, the model is inventing too aggressively for your source. This is the single most common disqualifying artifact.
- Text that matches the original. If signage, captions, or on-screen text in the source is readable, it should remain readable — and identical — in the upscale. Invented or altered letters mean the model hallucinated. This is a hard fail for documentary, archival, journalistic, or legal work.
- Motion that flows, not flickers. Step through fast-motion frames one at a time. Detail should be temporally consistent — a brick wall behind a moving subject should not change texture between frames. Flicker is the signature of a model with weak temporal coherence.
- Color that matches the source. Compare a still frame from the original next to the same frame from the upscale. Color shifts (warmer skin tones, cooler shadows, increased saturation) indicate the model is interpreting color, not just resolution. This belongs in your color-grading pass, not your upscaler.
- Shadow detail without banding. Dark areas should retain smooth gradient. If shadows show stepped banding or block-like patches, the source compression was too heavy and the model amplified the blocks. This is usually unfixable without a better source.
- Reasonable file size for the resolution. A 4K H.264 file that's only 5 Mbps is under-encoded — the upscaling work is being thrown away in compression. Compare the output bitrate to your target export specs.
- Audio still in sync. Many upscalers re-encode the container even when they don't touch the audio stream. Confirm that audio tracks are still present, in sync with the picture, and at the original sample rate and channel count.
Waxy skin, invented signage, and flickering background detail are not random failures. They are the predictable signature of an aggressive model running on heavily compressed source. Pull back one notch and rerun the test clip.
Advanced Workflow Tips — Mistakes That Quietly Cost You Quality
The difference between competent upscaling and professional upscaling lives in the small decisions around the processing step — what you do before, what you do after, and what you refuse to do at all.
- Never upscale already-upscaled footage. If a clip has been enlarged once, the artifacts and hallucinations from that pass become input to the second pass. The result compounds errors — invented detail gets re-invented on top of itself. Always work from the lowest-generation source you can access. If a client sends you "4K" footage that was clearly upscaled from 1080p, ask for the original 1080p file and do the work yourself.
- Decide upscaling versus frame interpolation before processing. Upscaling adds spatial resolution (more pixels per frame). Frame interpolation adds temporal resolution (more frames per second, e.g., 24 → 60 fps). They are separate operations. Run upscaling first on the original frame rate, then interpolate the upscaled output if you need higher fps — the interpolator has more pixel detail to work with on the second pass, and its motion estimation gets cleaner input.
- Match output bitrate to the resolution gain. A 4K H.264 export at 10 Mbps will undo the upscaling work in the compression stage. Use 50+ Mbps for 4K H.264, 25+ Mbps for 1080p H.264, or use H.265 at roughly 25–30 Mbps for similar perceptual quality at smaller file size. The bitrate must scale with the pixel count, not stay at whatever your editor's default preset proposes.
- Watch browser RAM on long files. Browser-based tools are constrained by available RAM. Files over 1 GB can cause slowdowns or tab crashes on systems with 8 GB total RAM, because the browser, the OS, and any other open applications are all competing for the same memory pool. Split long files into 5–10 minute segments, process separately, and concatenate the upscaled outputs in your editor.
- Know your hardware before choosing a tool. A laptop with integrated graphics will run any local upscaler slowly — browser, desktop, or otherwise. The bottleneck is silicon, not software. If processing time matters more than privacy, cloud is the rational choice. If privacy matters more, accept the slower local processing or split the work overnight. Pretending a weak GPU will run fast on a different tool is wishful thinking.
- Color space stays the same — upscaling is not color grading. An sRGB source comes out sRGB. Rec.709 to DCI-P3 conversion is a separate color-grading step in your editor or a dedicated color tool. Do not expect upscaling to fix color space mismatches, gamma errors, or white-balance problems. Those are independent corrections, and conflating them with the upscaling pass leads to compounded errors that are hard to diagnose later.
- Audio is usually untouched, but verify. Most upscalers pass audio through unchanged or re-encode the container without re-encoding the audio stream. Always check that audio is present, in sync, and not down-converted (48 kHz stereo should stay 48 kHz stereo; a drop to 44.1 kHz or to mono is a quality regression). If you need to edit the audio separately — trim it, isolate a section, remove an unwanted segment — do it before re-muxing into the final deliverable.
- Restoration before upscaling, not after. Scratches, dust, gate hairs, and tape damage will all be amplified by upscaling. The model treats damage as detail and sharpens it. Run restoration — denoise, dust removal, scratch repair — on the source before upscaling. Many video editors include basic restoration tools, and dedicated restoration software exists for archival projects. The order matters: clean, then enlarge.
- Verify you have the right to upscale the content. Upscaling someone else's footage does not change the copyright situation. Archive footage, stock clips, broadcast material, and client deliverables all carry their original licensing terms. Upscaling for personal evaluation is one thing; redistributing an upscaled version of a third party's content is a separate question to settle before processing. The technology makes copying and enhancement easy. The law has not caught up to that, but eventually it will.
The difference between a passable upscale and a professional one is rarely the tool — it's the source quality, the realistic resolution target, and the willingness to test before committing. An editor who runs a 10-second test clip, evaluates the five-zone check, and matches their output bitrate to the resolution gain will produce upscales that look indistinguishable from native high-resolution capture in most viewing contexts. The rest is patience, GPU time, and the discipline to throw out a result that doesn't pass the face check.