Harnessing Online Tools for Drone Footage Video Editing
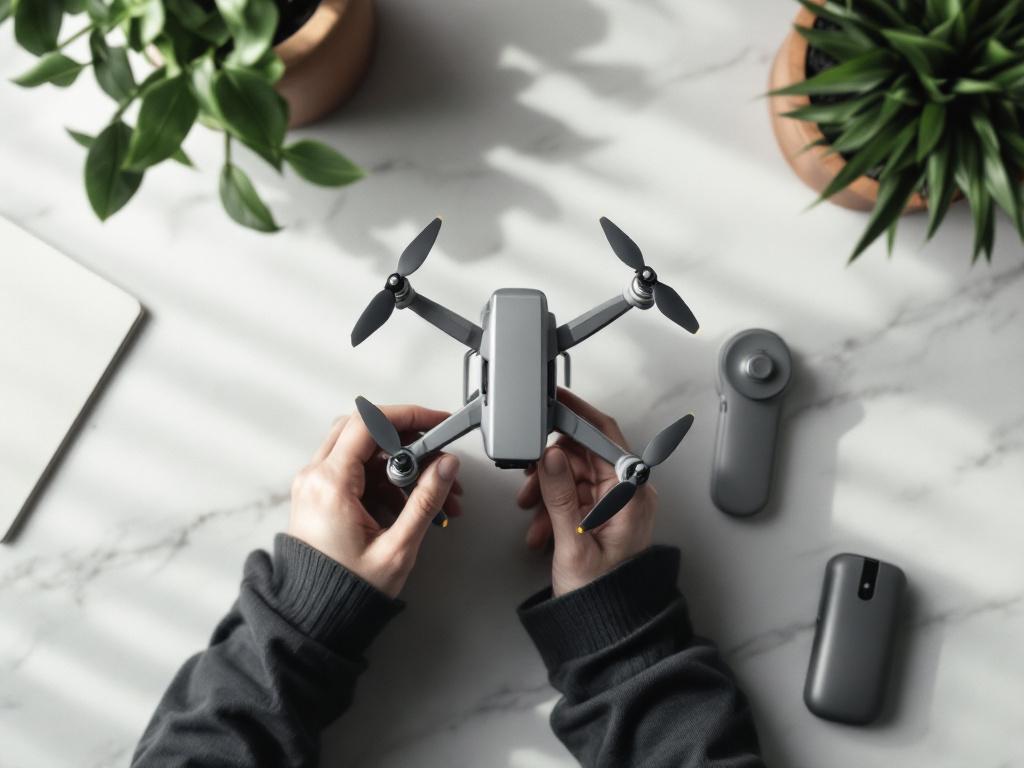
You've landed back at the desk with 45 minutes of raw 4K aerial footage from a weekend shoot, a laptop that stutters every time you scrub the timeline, and a Friday delivery deadline. Desktop NLEs cost $300-600+ before you've even opened the box. Cloud subscriptions add another monthly line item. Your client wants the cut by end of week. Drone footage editing carries technical demands — large H.265 files, flat color profiles, gimbal artifacts, redundant takes — that consumer-grade online video editing tools weren't originally designed to handle. Desktop pro tools, meanwhile, assume hardware most casual pilots don't own.
The gap has narrowed. Browser-based and hybrid editors now handle aerial-specific demands that would have been impossible three years ago — but only if you understand which tools actually work at 4K, how to prep your footage before upload, and where online workflows still hit ceilings. The rest reads like a field guide for getting professional aerial cuts out the door without buying into a $50/month editing suite.

Table of Contents
- Why Aerial Footage Breaks Standard Editing Workflows
- Online Editor Capability Matrix for Drone Workflows
- Pre-Upload Prep Checklist for Drone Files
- Color Grading Aerial Footage in Browser-Based Editors
- Timeline Logic for Drone Storytelling
- Stabilization — Editor-Native vs. Pre-Processing
- Export Settings That Match Where the Footage Is Going
Why Aerial Footage Breaks Standard Editing Workflows
Most editing tutorials assume you're cutting a vlog, a wedding, or an interview. None of those formats stress an editor the way aerial footage does. Five specific characteristics of drone files push online and browser-based editors past their comfort zone, and understanding each one tells you exactly what to fix before you start cutting.
File size and codec load. A DJI Mavic 3 or Air 3 records 4K at 100-150 Mbps in H.265 (HEVC). One minute of footage runs roughly 750 MB to 1.1 GB. A 45-minute shoot easily exceeds 35 GB before you've trimmed a single clip. H.265 is more storage-efficient than H.264 — that's the entire reason camera manufacturers adopted it — but it requires roughly twice the CPU and GPU power to decode in real time. According to tool documentation from packaging vendor Filmora, browser-based editors that stream from cloud storage hit decoding ceilings fast on H.265 source files. (All vendor-published claims in this article are flagged as such — independent benchmarks for these tools are not available in current sources.)
Flat color profiles. DJI drones ship with D-Log, D-Log M, or HLG profiles designed to preserve dynamic range. The trade-off: footage looks gray and desaturated straight out of camera. It's unwatchable until graded. Per VideoProc's documentation (vendor source), you must convert from D-Log to Rec. 709 — the standard color space for web and broadcast delivery — before color work begins. Skip that conversion and every grade you apply afterward fights the log curve.
Highlight clipping in skies. Aerial shots constantly aim cameras toward bright sky-and-ground splits. Sensors clip highlights when ground exposure is correct, and the resulting blown horizon has no recoverable detail. The fix demands graduated correction — sky pulled down, ground left alone — which means HSL controls or qualifier-based grading rather than a single global curve.
Gimbal drift and micro-jitter. Even three-axis gimbals introduce sub-degree drift on long ascents and wind-affected hovers. Standard image-analysis stabilization algorithms over-correct and produce a "jelly" warp where straight lines wave at the edges of frame. Aerial-aware stabilization needs to distinguish intentional motion (a planned reveal) from artifact (wind buffet) — and that's a harder problem than stabilizing a handheld walk.
Timeline density. Pilots shoot redundant takes because re-shooting requires another flight, another battery, another regulatory check. Three identical orbits, two duplicate ascents, four takes of the same reveal — a single project commonly carries 20-40 GB of near-duplicate clips. Online editor timelines slow noticeably past roughly 25 GB of source material without proxy workflows.
The rest of this article addresses these five constraints in order: tool selection first, then pre-upload prep, color grading, sequence logic, stabilization, and finally export. Solve them in sequence and aerial editing in online tools becomes routine instead of painful.
Online Editor Capability Matrix for Drone Workflows
The honest comparison of online video editing tools for aerial work is shorter than vendor marketing suggests. Most tools that handle drone-scale projects are hybrid — desktop apps with cloud collaboration layered on top — rather than pure browser execution. The table below captures documented specs from vendor sources only; independent benchmarks comparing real-world 4K performance across these tools are not publicly available.
| Tool | Platform | 4K / H.265 Support | Color Tools | Free Tier |
|---|---|---|---|---|
| CapCut (Web) | Browser | 4K, H.265 import | Basic curves, LUT import | Yes (some watermarks) |
| DaVinci Resolve | Desktop, all OS | 4K, H.265 native | Full color page, HDR, HSL | Yes, full feature |
| Adobe Premiere + Frame.io | Desktop + cloud review | 4K, H.265 | Lumetri Color panel | No (subscription) |
| DJI LightCut | Mobile, DJI-native | 4K real-time preview | Filters, presets, LUT | Yes |
| VideoProc Vlogger | Desktop | 4K, H.265, D-Log to Rec. 709 | Color wheels, LUTs | Yes |
| Wondershare Filmora | Desktop + cloud | 4K, H.265 | LUT, color match, HSL | Trial with watermark |
Sources: vendor product pages for DJI LightCut, Filmora, and VideoProc.
Three observations from the matrix matter more than the cell values themselves.
Pure browser-only editors remain limited at 4K. CapCut Web and similar tools function at 4K but performance degrades on long timelines, particularly with H.265 source. Most workflows that handle drone-scale projects end up hybrid — desktop apps with cloud review, asset libraries, or collaboration layered on top (Frame.io, Resolve cloud projects). A fully in-browser 4K aerial workflow with full manual color control does not yet exist in any tool documented in available vendor sources. That's worth stating plainly because vendor marketing implies otherwise.
DJI LightCut is the only tool with native drone integration. It connects directly to DJI aircraft and remote controllers, previews 4K without offloading files to a computer first, and applies template-based edits on the controller itself. The trade-off is minimal manual control, mobile-first interface, and lock-in to DJI hardware. For pilots already inside the DJI ecosystem who want a quick-share workflow, the friction is genuinely low. For anyone who wants frame-level precision or custom color, LightCut isn't where you finish — it's where you draft.
Free desktop options remain stronger than browser-only. DaVinci Resolve's free tier covers nearly every professional need: 4K, full color grading, Fairlight audio, Fusion compositing. For pilots whose laptops can run it, "online" usually means cloud collaboration on top of desktop editing rather than pure browser execution. For single-clip prep — trimming a take before pulling it into a longer edit — a focused Online Video Trimmer cuts overhead compared to loading a full timeline. That's a different job than full editing, and the right tool for it isn't a full editor.
Pre-Upload Prep Checklist for Drone Files
The work that prevents 80% of online editing problems happens before you upload a single file. Drone projects that struggle in browser-based editors almost always struggle for the same reasons — too much data, wrong codec, unverified color tags, no proxies. The eight items below address each cause directly.
1. Generate proxy files at 1/4 or 1/2 resolution. A 4K H.265 source becomes a 1080p H.264 proxy at roughly 25-35% of original size. Most editors swap proxies for full-resolution source automatically at export time, so you edit fast and render clean. This is the single biggest performance gain available for online and browser-based timelines.
2. Convert H.265 to H.264 if your editor stutters. H.264 decodes faster on modest CPUs. Use HandBrake (free) or your editor's built-in transcode function. Expect about a 1.3-1.6x file size increase but smoother playback. On a laptop without GPU acceleration, that trade-off is almost always worth it.
3. Verify color space tags. Drone files often carry HLG or Rec. 2020 metadata. Confirm your editor reads the tag correctly — some browser tools default-assume Rec. 709 and shift color silently on import. Convert D-Log footage to Rec. 709 explicitly before grading if your tool lacks log support, per VideoProc's documentation (vendor source).
4. Cull aggressively before upload. Delete duplicate orbits, false starts, and shaky takeoff/landing segments offline. Uploading 35 GB when 12 GB is usable wastes upload time, storage quota, and timeline performance. Be ruthless. The third orbit at the same altitude is rarely better than the first.
5. Organize by shot type. Folders for Establishing / Reveal / Detail / Transition reduce timeline search time substantially. Aerial shoots produce visually similar clips — naming and folder structure matter more for drone work than for ground footage where shots are inherently more varied.
6. Strip audio tracks if unused. Drone audio is mostly motor noise. Remove it during transcode to drop file size and avoid accidental sync issues downstream. If you recorded a separate ambient or voice-over track, keep that one and dump the rest.
7. Test one clip end-to-end first. Upload, preview, color-touch, export. This single test catches editor bugs, account size limits, codec rejections, and unexpected color shifts before you commit a full project's worth of upload time.
8. Back up source files locally before upload. Cloud storage inside an editing tool is project workspace, not archive. Keep original SD card dumps on a local SSD or NAS. Cloud projects expire, accounts get downgraded, and "cloud-only" assets can disappear in ways your archive shouldn't.
If you're isolating ambient audio from the drone or trimming a voice-over track separately from the video edit, an Online Audio Cutter handles single-track prep without launching a full editor. That kind of focused tool is faster than wrestling audio inside a video timeline for one-off jobs.

Color Grading Aerial Footage in Browser-Based Editors
Color is where drone footage editing gets technically dense. The contrast range of aerial material is extreme, the skies punish sloppy exposure, and a flat D-Log clip looks worse than a phone snapshot until graded. Five specific grading challenges define the work.
Recovering blown skies. Aerial sensors clip highlights at the horizon line constantly. The fix is a graduated mask or HSL qualifier that selects the blue and cyan range of the image, then pulls highlights down 15-25% and adds back saturation in the same pass. In CapCut Web, this means HSL controls. In DaVinci Resolve, qualifiers on the color page handle it more precisely. In Premiere's Lumetri panel, the HSL Secondary section does the job. Per Filmora's feature documentation (vendor source), most tools surveyed support some form of HSL targeting, though the depth of control varies significantly between browser and desktop tiers.
Converting D-Log to Rec. 709. DJI publishes free official LUTs for D-Log to Rec. 709 conversion on their developer site. Apply the LUT first as a base node, then grade on top of the converted image. Skipping this step and trying to grade flat log footage directly produces muddy, plastic-looking results that no amount of secondary correction fixes. Most desktop tools support DJI LUT import natively. Some browser editors do not — verify before committing your project to a tool that can't read the conversion file.
Thermal and altitude color casts. Footage shot above roughly 300 ft often picks up a magenta or cyan cast from atmospheric scattering — light bouncing off particulates between the camera and ground. Correct with a global tint shift on the offset wheel: push toward green to neutralize a magenta cast, toward red for cyan. The correction is subtle, usually 3-8 points rather than 20. Over-correct and the image swings the other way.
Color wheels versus curves. Wheels (lift, gamma, gain) are faster for global tonal shifts and look-matching across clips. Curves are precise for isolating a specific tonal range — recovering the upper third of the histogram without touching midtones, for instance. Aerial work uses both: wheels for the base look, curves for sky and water separation where the tones overlap and need surgical control.
Batch grading across an aerial sequence. Online editors increasingly support adjustment layers or color match features. Grade the strongest representative shot first, then copy that grade across the rest of the sequence. Match small per-clip variations using offset wheel adjustments only — never re-grade from scratch on similar shots. Re-grading produces drift; copying with offsets produces consistency.
Drone footage exposes every grading mistake. The contrast range is extreme, the skies are unforgiving, and there's nowhere for sloppy color to hide.
A note on realistic limits: pure browser-based editors offer measurably fewer color tools than desktop counterparts. CapCut Web's color panel is shallower than Resolve's full color page. For a heavily graded aerial piece, a hybrid workflow — desktop grading paired with browser-based collaboration and review — remains the practical answer. Pure browser grading on professional aerial work isn't yet workable based on documented tool capabilities in current vendor sources.

Timeline Logic for Drone Storytelling
Tools and color get attention because they're tangible. Sequence logic gets ignored, and that's where most aerial edits fail. A drifting drone shot without intent feels like a real estate listing regardless of how well it's graded. Six principles of aerial video editing carry the structural weight.
Establish, Detail, Release — the three-shot aerial pattern. Open with a wide establishing shot (5-8 seconds), cut to a detail shot at lower altitude or closer to subject (3-5 seconds), then release with a movement shot — a pull-back, ascent, or reveal (4-6 seconds). The pattern works because it mirrors how viewers process unfamiliar landscapes: orient to the geography, examine the subject, exit the scene. Break the pattern deliberately for emphasis, never accidentally.
Pace altitude changes against music or narration, not arbitrarily. A 30-second ascent feels indulgent without a reason for the eye to stay engaged. Cut ascents at the moment the frame's primary subject becomes visible, or hold them only when narration or music carries weight underneath. A long shot needs a long reason.
Cut density: 4-8 shots per minute for aerial-heavy sequences. Tighter than 8 cuts per minute feels frantic and fights the contemplative quality drones produce naturally. Looser than 4 feels like a property listing or a stock-footage reel. This is a rough guide rather than a rule — slow piano scores tolerate 3 cuts per minute; high-energy edits sustain 10 or more. Match cut density to the emotional register of the soundtrack.
Treat gimbal drift as either signal or noise, not both. Either stabilize ruthlessly across the whole piece for a clean, locked-off feel, or accept drift as part of an organic, handheld-aerial look. Mixing stabilized and unstabilized shots within a single sequence reads as a technical mistake to viewers, even if they can't articulate why. Pick one approach and commit.
Work proxies until the final 10%. Set the timeline to 1/4 resolution playback while editing structure, pacing, and rough cuts. Switch to full resolution only for color grading on hero shots and the final QC pass. This single habit converts a stuttering online timeline into a usable one without any other intervention. When you only need to lift a single clean section out of a longer take before bringing it onto the timeline, an Online Video Trimmer handles that prep step without launching the full editor.
Naming convention: Scene_Altitude_Take. A clip labeled Coast_120m_03 is searchable. A clip labeled DJI_0247.MP4 is not. Aerial projects with 100+ clips become unmanageable without naming discipline. Rename in batch on import — most editors support pattern-based renaming on ingest, and the 90 seconds you spend setting it up saves hours later.
A drifting aerial shot without intent feels like a real estate listing. Add one cut, one subject, or one reason to land — and it becomes storytelling.
Drone videography lives or dies on these structural choices more than on pixel-level color or stabilization perfection. A roughly graded sequence with sharp cut logic outperforms a beautifully graded sequence with no rhythm. Order of operations matters: structure first, color second.
Stabilization — Editor-Native vs. Pre-Processing
Stabilization is one of the few areas where the right tool depends heavily on how rough your footage is. Light wind on a three-axis gimbal forgives almost any approach. Heavy gusts on a long ascent demand pre-processing. The four practical approaches below cover the realistic options.
| Approach | Where It Runs | Strength | Weakness |
|---|---|---|---|
| Editor-native (Resolve, Premiere) | Inside the timeline | Fast iteration, non-destructive | Limited range on heavy motion |
| CapCut auto-stabilize | Browser/mobile | One-click, fast | Aggressive, can flatten intent |
| Gyroflow (open source) | Pre-processing | Uses drone gyro metadata | Requires separate render step |
| FFmpeg + vidstab | Command line | Free, batch-capable, scriptable | Steep learning curve, no GUI |
Three observations from working with these approaches across enough drone projects to draw practical conclusions.
Native editor stabilization handles the common case. Sub-degree gimbal drift, mild wind buffet, and short hovers correct cleanly inside Resolve, Premiere, or Filmora. For roughly 80% of aerial footage shot in light wind on a calibrated three-axis gimbal, editor-native stabilization is sufficient. Per Filmora's documentation (vendor source), most documented online video editing tools include some form of automatic stabilization, though correction depth varies between tools.
Pre-processing wins for heavy-motion footage. Gyroflow reads the drone's gyroscope metadata directly (where supported — DJI, GoPro, Insta360 cameras) and applies geometric correction more accurately than image-analysis stabilization can manage. Image analysis has to guess what's intentional motion versus artifact. Gyro metadata knows. The trade-off is an extra render step before footage hits your timeline. Worth the time on footage shot in strong wind, on long ascents, or with manual yaw inputs.
Auto-stabilization is not free of cost. Aggressive stabilization crops the frame 5-15% to absorb correction. Apply it to footage already framed tightly and you lose composition you can't recover. Always preview at full resolution before committing — a stabilization pass that looks fine at 1/4 resolution proxy can introduce subtle warp artifacts visible only at 4K on a large screen. Catch them before export, not after the client does.
A realistic limit worth stating: no purely browser-based online editor in available vendor sources offers gyro-metadata-based stabilization. That capability remains desktop-bound or requires pre-processing for now. If your footage genuinely needs gyro-level correction, plan for a desktop step in the workflow rather than expecting a browser tool to handle it.
Export Settings That Match Where the Footage Is Going
Export is the last decision point where drone footage editing can go sideways. The wrong codec, mismatched color tags, or a bitrate that ignores the destination platform produces files that look worse than the timeline preview. Eight decisions cover most delivery scenarios — work through them before you click render.
- Match export resolution to source. 4K source goes out as 4K. Never upscale 1080p to 4K — it adds file size without adding resolution and platforms catch the trick. Downscale 4K to 1080p only if the destination caps there or bandwidth is genuinely a constraint.
- Choose codec by destination. YouTube, Vimeo, and social platforms accept H.264 most reliably. For archival or further editing, ProRes 422 (or DNxHR if you're delivering into an Avid pipeline) preserves quality at the cost of large files. For client review only, H.265 produces smaller files but slows decode on the reviewer's machine. Pick based on who opens the file next.
- Set bitrate to platform spec. YouTube recommends roughly 45 Mbps for 4K 30fps and roughly 68 Mbps for 4K 60fps in H.264. Going higher wastes file size — YouTube re-compresses everything on upload regardless of how fat your source is. The platform spec is a ceiling, not a floor.
- Confirm color space tag. Rec. 709 for web and social delivery. HDR (Rec. 2020 with HLG or PQ transfer) only if you graded in HDR throughout the project. Mismatched tags produce washed-out or oversaturated playback that you'll only notice when the client points it out.
- Match frame rate to source. 24, 30, or 60 fps — match what you shot. Conforming 60 fps footage to 24 fps requires deliberate slow-motion or frame-blending decisions, not export-time conversion. Frame rate mismatches produce judder that no playback device fixes.
- Check audio specs. 48 kHz, 16-bit minimum, AAC for delivery. Stereo unless you mixed surround intentionally and the destination supports it. Drone projects often have minimal audio, but specs still apply. If the final mix needs trimming or a quick fade applied to a separate music or voice track, an Online Audio Cutter handles that pass without re-rendering the full timeline.
- Allow 2-3x render time for online tools. Browser-based and cloud-rendered exports run measurably slower than local desktop renders because they share queues and bandwidth. A 5-minute 4K export can take 15-30 minutes on a cloud queue. Plan delivery accordingly — don't promise a render time you've never measured on the specific tool you're using.
- Save the project file separately from the export. Don't assume the cloud workspace is permanent. Download the project state to local backup after delivery. Cloud accounts get downgraded, services shut down, and "cloud-permanent" projects disappear. Local backup is the only backup that survives those events.
A common question worth answering directly: can a 4K aerial project be edited entirely in a browser? Technically yes, for short pieces with proxies and modest color work. Practically, hybrid workflows — desktop edit with cloud review — remain more reliable for projects above roughly 10 minutes of runtime, based on the tool capabilities documented in vendor sources cited throughout. The browser tier keeps improving, and a fully browser-based workflow for short-form aerial content is already viable. For longer or more heavily graded work, the hybrid path gets you there faster.
Which tool to start with? For DJI pilots already inside the ecosystem, DJI LightCut is the lowest-friction entry — direct controller integration, real-time 4K preview, no file offload. For anyone planning to grow past templates and build real grading skills, free DaVinci Resolve has effectively no ceiling, and the same color and timeline skills transfer to any other professional NLE later. The decision isn't really about which tool is "best." It's about which tool matches the next 12 months of your work, and which leaves you with skills you keep when you outgrow it.