How to Convert Video to HD 1080p Online for Free (No Upload Required)
Why Most "Free 1080p Video Converters" Quietly Fail You
You've got a 720p screen recording from yesterday's product demo, your client's spec sheet says "deliver in 1080p," and the upload deadline is in 45 minutes. You search convert video to hd 1080p online free, click the first result, and discover: a 100 MB upload cap, a watermark stamped across the output, or a $9.99 "remove limits" prompt that appears only after the conversion finishes.
That pattern isn't an accident — it's the business model. Most free online converters route your file through a server in another country, strip metadata, apply a logo, or cap resolution unless you pay. For anyone handling client footage, internal recordings, or anything sensitive, that round-trip is a non-starter.
There is another way. A browser-based converter using WebAssembly-compiled FFmpeg can re-encode your video to 1920×1080 entirely on your device — no upload, no account, no watermark, no file size cap tied to a paywall. The catch: to convert video to hd 1080p online free and actually get a usable file, you need to understand what 1080p conversion actually does (and doesn't do) and which settings control the output quality. This guide covers both.
By the end, you'll know exactly which input formats work, what bitrate to pick for your use case, how to perform the conversion in under 5 minutes, and how to verify the output is genuinely 1080p before you deliver it.
Table of Contents
- Conversion vs. Upscaling: What Browser Tools Can and Can't Do With Your Resolution
- Which Input Formats Convert Cleanly to 1080p in the Browser
- Converting Your Video to 1080p in Under 5 Minutes: A Step-by-Step Walkthrough
- How Bitrate and Codec Choice Decide Whether Your 1080p Output Looks Sharp or Smudgy
- What You Lose When You Upload a 1080p File to a Cloud Converter
- Confirming Your File Is Genuinely 1080p — Plus the Five Most Common Conversion Errors
Conversion vs. Upscaling: What Browser Tools Can and Can't Do With Your Resolution
Before you touch any setting, separate three operations that get conflated under the phrase "convert to 1080p." Getting this wrong is the single biggest reason people end up disappointed by their output file.
Native 1080p capture means the file was recorded at 1920×1080 pixels in the first place. Each pixel carries real captured data from the sensor. There's nothing to "convert" in terms of resolution — only possibly the format or codec (for example, switching from MOV to MP4).
Conversion to 1080p is the most common case. The file was recorded at 1920×1080 but lives in a different container or codec — a MOV file from an iPhone, an MKV from a screen recorder, a ProRes master from a camera. Re-encoding happens, but pixel dimensions stay the same. Done correctly, this is where browser-based tools shine.
Upscaling to 1080p is the operation people most often want but rarely understand. The source was captured at lower resolution — 854×480 or 1280×720 — and you're asking the encoder to stretch the canvas to 1920×1080. The converter has to invent pixels. Standard FFmpeg uses interpolation algorithms (bilinear, bicubic, lanczos) that smooth the result but cannot add detail that wasn't captured. AI-based upscalers like Topaz Video AI and similar paid desktop tools use neural networks trained to hallucinate plausible detail. Browser FFmpeg does not do this.
Be explicit with yourself: if your source is 480p, converting to 1080p will make the file dimensions 1920×1080, but the visual output will look like 480p footage stretched across a larger canvas. You are not getting back detail that was never recorded.
Converting to 1080p output is not the same as improving blurry footage. You're changing the canvas dimensions and re-encoding existing data — not adding detail that was never captured.
Here's the realistic expectation for each scenario you're likely to encounter:
- 720p → 1080p: Acceptable for social media playback and minor zoom tolerance. Lanczos interpolation handles this reasonably; viewers on small screens rarely notice.
- 480p → 1080p: Noticeably soft. Use only when the destination platform requires 1080p as a minimum spec and you have no better source.
- 1080p source (different codec) → 1080p H.264 MP4: Effectively lossless visual quality if bitrate is set high enough. This is the ideal use case for a browser converter.
- 4K → 1080p (downscale): Excellent results. Downscaling concentrates pixel data, and output often looks sharper than native 1080p because the encoder has surplus information to work with.
Browser-based tools handle all of these, but with two practical limits worth understanding upfront. First, processing speed depends on your CPU, not a server farm — a modern laptop will encode faster than a five-year-old budget machine, and there's no way around that. Second, browser memory caps mean very large files (typically beyond 5 GB) may need to be trimmed first, because each browser tab is allocated a finite working memory budget regardless of how much RAM your machine has.
The conversion-versus-quality distinction matters because changing the resolution label is trivial. Making the result look good depends on bitrate and codec, which is what the bitrate section covers in detail.
Which Input Formats Convert Cleanly to 1080p in the Browser (And Which Need Special Handling)
Container format (MP4, MOV, MKV) and codec (H.264, H.265, VP9, ProRes) are separate concerns that get blurred together. WebAssembly FFmpeg can read most containers, but performance and reliability vary depending on what's actually inside the wrapper.
| Input Format | Codec(s) | Browser Decode Speed | Typical File Size (per min, 1080p) | 1080p Output Quality |
|---|---|---|---|---|
| MP4 | H.264 / H.265 | Fast (H.264) / Moderate (H.265) | 30–80 MB | Excellent |
| MOV | H.264 / ProRes | Moderate / Slow | 60 MB to 1.5 GB | Excellent |
| MKV | H.264 / H.265 / VP9 | Moderate | 40–100 MB | Excellent |
| WebM | VP9 / AV1 | Fast (Chrome) / Slow (Safari) | 25–60 MB | Very Good |
| AVI | Xvid / DivX / MJPEG | Slow | 100–300 MB | Good |
MP4 with H.264 is the fastest path to re-encode. The codec is mature, the FFmpeg implementation has been optimized for over a decade, and most browsers ship with well-tuned WebAssembly paths for it. If you can choose your source format, choose this one.
H.265 (HEVC) input takes roughly 30–60% longer to decode in the browser because WebAssembly cannot reach hardware HEVC decoders the way native applications can. The conversion still works; it just runs slower. For a 5-minute clip, expect 3–5 minutes of processing instead of 1–2.
ProRes inside MOV files — common from iPhone Pro models in their high-quality recording mode and from prosumer cameras — decodes slowly because the codec is intra-frame and the file sizes are massive. The upside: the source is high-bitrate, so 1080p output looks superb. If you convert MP4 to 1080p from a ProRes source, plan for 2–3× longer processing but expect excellent results.
AVI from older sources may use legacy codecs (Xvid, DivX, MJPEG) that aren't always optimized in WebAssembly FFmpeg builds. If your AVI conversion stalls, consider re-saving the file in another tool first to get it into a modern container.
MKV files with multiple audio tracks or subtitle streams sometimes need stream selection before conversion. Single-stream MKVs convert without issues. If you're working with a multi-language file, you may need to pre-trim.
WebM (VP9 or AV1) decodes well in Chrome and Edge, both of which carry strong VP9 decode support. Safari's WebM handling is weaker, and conversion runs slower. If you're working with a WebM source on Mac, expect the WebM to 1080p converter path to take longer than the equivalent MP4 path. If your MKV file exceeds 2 GB, trim it first using a browser-based video trimmer before running the 1080p conversion — this avoids memory pressure during encoding.
The MOV to 1080p path is where most iPhone and prosumer-camera users land. The good news: even though ProRes decodes slowly, the high-bitrate source means the resulting MP4 will look essentially indistinguishable from the original at sensible output bitrates.
Converting Your Video to 1080p in Under 5 Minutes: A Step-by-Step Walkthrough
The full process — from opening the tool to downloading the finished file — takes 2 to 8 minutes depending on source size and your CPU. Here's the exact sequence.
1. Open the converter. Navigate to a browser-based video conversion tool and select the video conversion option. To convert video to hd 1080p online free, you want a tool that loads as a single-page app; the first load takes 5–10 seconds while WebAssembly FFmpeg initializes. After that, conversions start instantly.
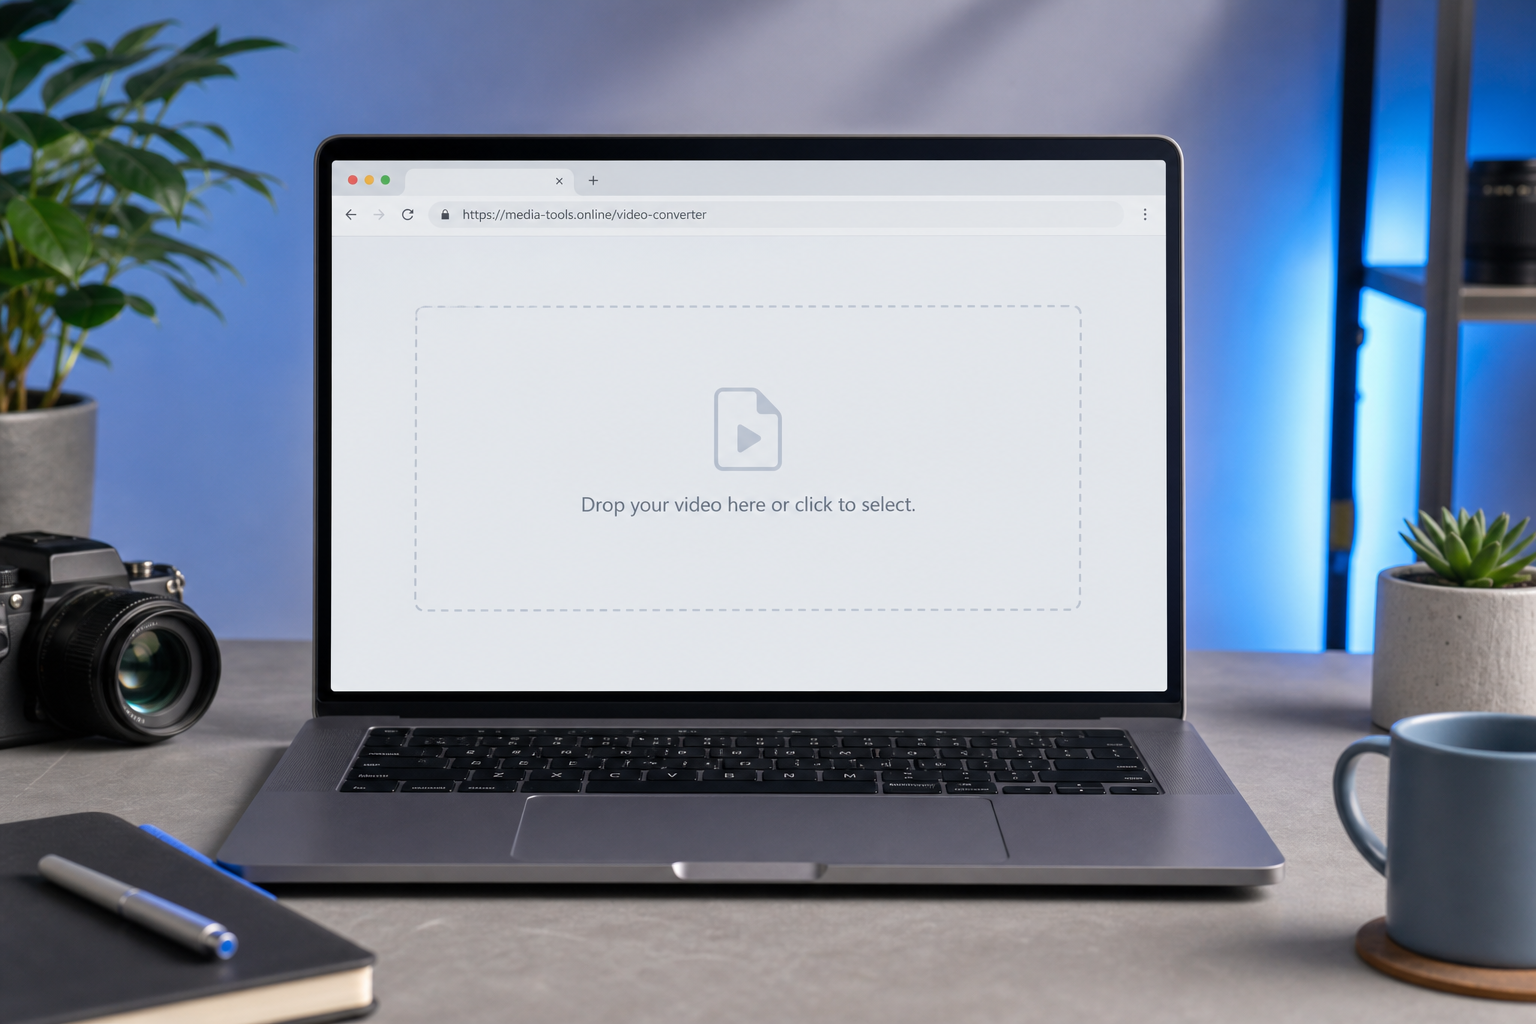
2. Load your file. Drag the file onto the drop zone or click "Select file." Your file stays on your device; no upload progress bar appears because there is no upload happening. If you want to confirm this with a free 1080p video converter, open your browser's developer tools, switch to the Network tab, and watch the outbound bytes counter — it should stay at zero throughout the entire process.
3. Open output settings. Click the settings or gear icon next to the loaded file. You'll see controls for output container (MP4 recommended), video codec (H.264 recommended), resolution dropdown, bitrate field, framerate (leave as source unless required), and audio codec.
4. Set resolution to 1920×1080. Pick the "1080p" preset or manually enter 1920×1080 into the width and height fields. If your source has a non-16:9 aspect ratio (vertical phone video, square Instagram clip), choose "fit" to add letterbox bars or "fill" to crop — the tool will show both options before you commit.
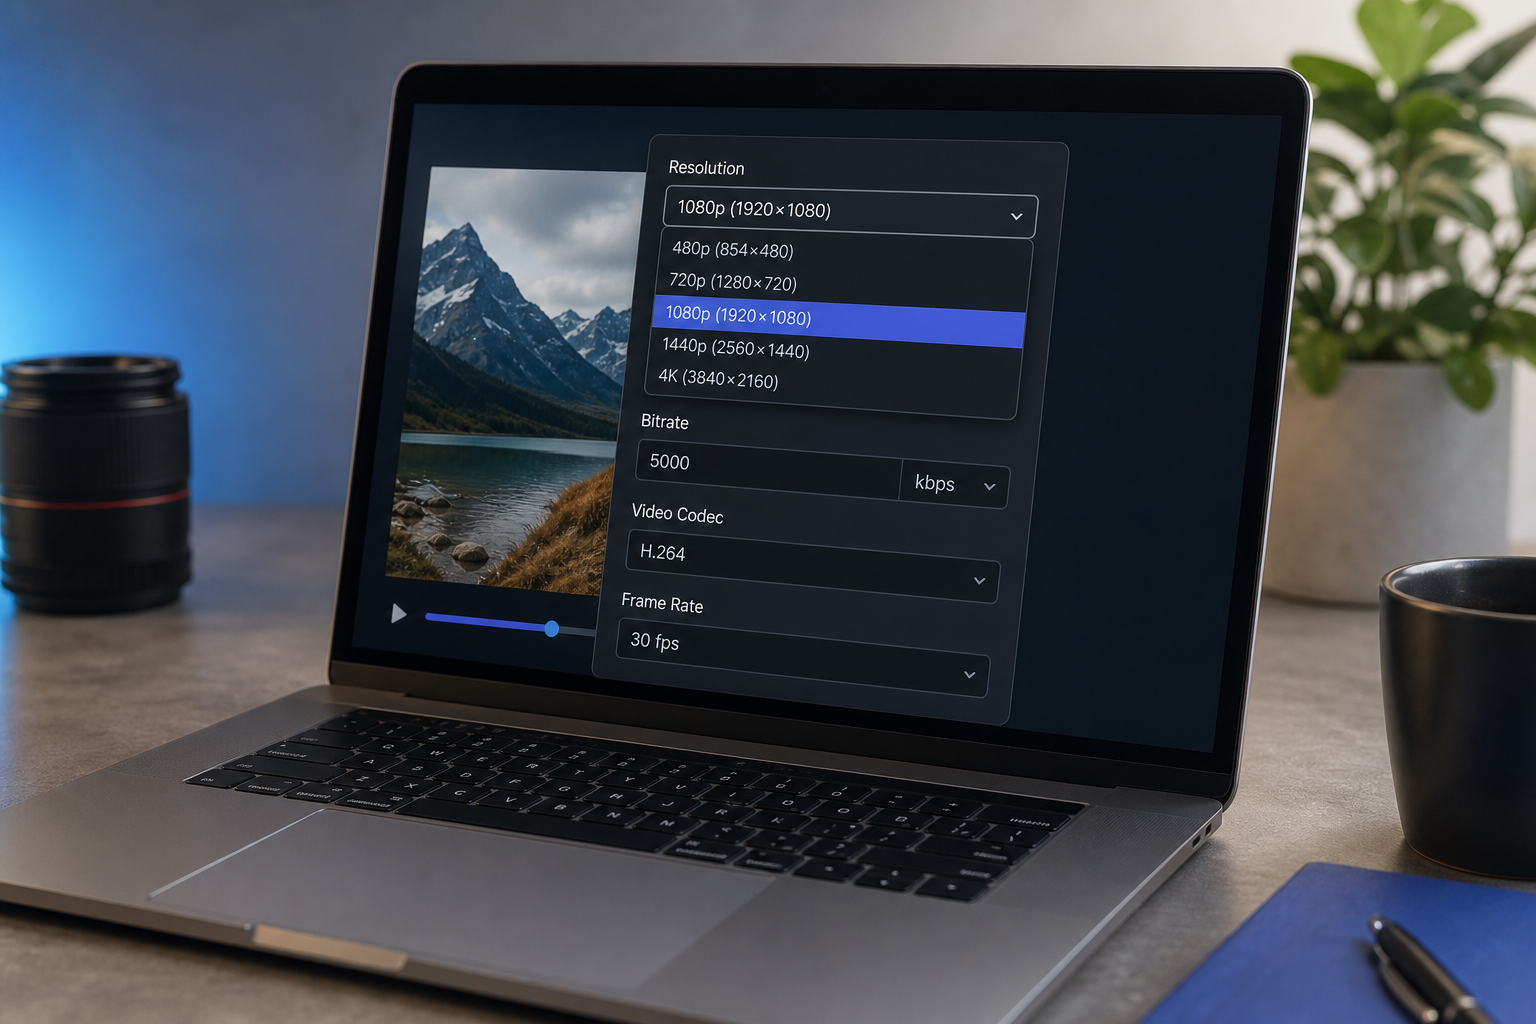
5. Set bitrate. Use 5,000 kbps (5 Mbps) for general delivery, 8,000 kbps (8 Mbps) for client deliverables, or 2,500 kbps (2.5 Mbps) only for web previews where file size is critical. The next section explains why these numbers matter.
Tip: If your source is below 1080p (for example, 720p), the converter will technically output 1920×1080 but the visual quality reflects the source. That's an upscale, not a true conversion — see the resolution section for why.
6. Confirm codec. H.264 for universal playback is the safe default. Switch to H.265 only if both you and your recipient have confirmed that their players support it. H.265 saves file size but creates compatibility headaches in older editing tools, QuickTime, and many web players.
7. Start conversion. Click "Convert." Progress shows as a percentage; processing time depends on source duration, output bitrate, and your CPU. A rough estimate: a 5-minute 1080p output on a modern laptop takes about 1–3 minutes. Doubling the source duration roughly doubles the processing time.
8. Download the result. When conversion completes, click "Download." The file saves to your default browser download folder. The original file on your disk is never touched.
9. Verify before delivery. Open the file. Right-click → Properties (Windows) or Get Info (Mac) and confirm "1920×1080" appears in dimensions. The verification section at the end covers the full check, including codec and bitrate inspection.

How Bitrate and Codec Choice Decide Whether Your 1080p Output Looks Sharp or Smudgy
Here's the misconception worth busting up front: resolution is a label; bitrate is the substance. A 1920×1080 file at 1 Mbps and a 1920×1080 file at 8 Mbps have the same pixel dimensions but radically different visual quality. The browser conversion tool gives you both knobs — most readers only ever adjust the first one and wonder why their output looks soft.
Bitrate measures bits per second of video data. Higher bitrate means more data allocated per frame, which means more detail preserved — particularly in motion (camera pans, action sequences) and in complex textures (grass, water, hair, fine patterns). When the encoder runs out of bits, it has to throw away information. The places it throws information away first are exactly the places your eye notices.
1080p has a real bitrate floor. Below roughly 2 Mbps, H.264 encoders run out of headroom to encode all the pixels at 1920×1080 cleanly. The visible result: blockiness in dark scenes, mosquito noise around sharp edges, smeared motion in anything that moves quickly. Going below this floor doesn't save you proportional file size; it just degrades the output noticeably.
The 1080p video bitrate recommendations below cover the realistic range for H.264 output:
| Use Case | Recommended Bitrate (H.264, 1080p) | Approx. File Size (5 min clip) |
|---|---|---|
| Web preview / small social embed | 2.5–3 Mbps | ~95–115 MB |
| YouTube / standard social post | 5–6 Mbps | ~190–225 MB |
| Client deliverable / high-detail screen recording | 8–10 Mbps | ~300–375 MB |
| Archival / re-editable master | 12–20 Mbps | ~450–750 MB |
A 1080p file encoded at 2 Mbps will disappoint you on a 27-inch monitor. The same resolution at 6 Mbps looks legitimately professional. Resolution is the label; bitrate is the substance.
The H.264 vs H.265 1080p decision comes down to compatibility versus efficiency. H.265 (HEVC) achieves the same visual quality as H.264 at roughly 40–50% lower bitrate. That's a real saving — a 200 MB H.264 file might become a 110 MB H.265 file at indistinguishable quality. The trade-off: H.265 takes substantially longer to encode in WebAssembly because there's no hardware acceleration path available, and some older browsers, QuickTime versions, and embedded players don't decode it natively. The practical rule: use H.264 unless the recipient has explicitly confirmed H.265 support and file size is a binding constraint.
A simple file size estimation formula is useful when you're trying to predict storage or upload time:
File size (MB) ≈ (bitrate in Mbps × duration in seconds) ÷ 8
So a 5-minute clip at 6 Mbps comes out to roughly (6 × 300) ÷ 8, or about 225 MB. Audio adds roughly 5–10 MB depending on the audio bitrate. This estimate is close enough to plan around for delivery sizing.
There's a quality benefit to local re-encoding that often goes unmentioned. Cloud converters typically transcode twice — once on the upload server (to normalize the input) and once on the output server (to produce the deliverable format). That compounds the inherent loss of any lossy codec. Browser-based FFmpeg performs a single re-encode pass on your machine. The source-to-output quality loss is the unavoidable loss of one lossy codec pass — no more, no less.
A quick footnote on frame rate: if the source is 30 fps, keep the output at 30 fps. Setting the output to 60 fps from a 30 fps source doesn't add smoothness — it just duplicates frames and inflates the file size. The only time to change frame rate is when the destination platform mandates a specific value.
For 90% of deliverables, the right answer for best codec for 1080p output is straightforward: 1920×1080 at 6 Mbps H.264 with source frame rate. Adjust only when the destination spec or your storage budget demands something different.
What You Lose When You Upload a 1080p File to a Cloud Converter
Cloud converters are convenient until you start tallying the hidden costs. Each item below is something you actively trade away when you upload, and almost none of these costs show up in marketing copy.
1. Upload time scales with file size, not just internet speed. A 500 MB 1080p file on a 25 Mbps residential upload connection takes roughly 2.5 minutes just to upload — before any conversion begins. The round-trip (upload, queue, cloud process, download) frequently takes longer than a local re-encode would take on a modern CPU.
2. Your file sits on someone else's server. Cloud converters' terms of service typically grant them temporary processing rights and store files for 1–24 hours after conversion completes. For client footage, internal recordings, NDA-bound material, or anything containing personally identifiable information, that's a compliance issue. A free 1080p converter no upload approach via browser conversion never transmits the file off your device — there's nothing on a server to leak.
3. Watermark insertion is the default monetization model. Free tiers on services like Clideo, Veed, and similar mainstream converters apply visible watermarks to output unless you upgrade to a paid tier. An online video converter no watermark approach that runs locally has no business model that requires watermarking — there's no server-side processing cost to subsidize, so there's no need to upsell.
4. File size caps lock you out at 1080p. A 10-minute 1080p video at 6 Mbps is roughly 450 MB — already past the free-tier upload limit of many cloud converters, which typically cap at 100–500 MB. Local processing has no equivalent cap. The only ceiling is your browser's memory budget, typically 2–4 GB of working memory per tab in Chrome and Edge.
5. No account, no email, no card on file. A private video converter that runs in your browser requires zero registration because there is no usage to meter. Cloud tools collect emails specifically to remarket subscription tiers and to associate processing history with a user identity.

6. Cost per conversion is zero, not metered. Some cloud converters meter by minute of output, typically charging $0.50–$2 per minute for "premium" conversions that remove watermarks or raise size caps. Convert ten 5-minute videos and the bill hits $25–$100. Local conversion costs your CPU time and nothing else. If your conversion job is audio-only (extracting or trimming the audio track from a video), use a dedicated audio-specific browser tool instead — it skips the video pipeline entirely and runs much faster.
7. Offline capability after first load. Once the WebAssembly module loads into your browser, conversion runs without any network access. Useful for travel, secure environments, train rides, or unstable connections. Cloud converters fail entirely without a stable upload pipe — and a flaky connection that drops mid-upload usually means starting over.
The trade-off is real but small: cloud servers have more CPU than your laptop, so they finish a 30-minute 4K-to-1080p conversion faster. For typical 1080p outputs under 10 minutes long, local processing wins on every other axis — privacy, cost, watermarking, file size limits, and reliability.
Confirming Your File Is Genuinely 1080p — Plus the Five Most Common Conversion Errors and How to Fix Them
After conversion completes, do three quick checks before delivering the file. Skipping verification is how soft 720p-upscaled-to-1080p files end up in client folders.
Check dimensions in file properties. On Windows, right-click the file → Properties → Details tab → look for "Frame width: 1920" and "Frame height: 1080." On Mac, right-click → Get Info → More Info section. The verify video resolution 1080p check is important to remember: if your source was below 1080p and you set the converter to 1080p, dimensions will read 1920×1080 even though the visual quality reflects the lower-resolution source. The metadata says what you asked for; the pixels tell a different story.
Inspect codec and bitrate in VLC. Open the file in VLC (free, cross-platform), then go to Tools → Codec Information (Ctrl+J on Windows, Cmd+I on Mac). Confirm: codec is H264 (or H265 if you chose it), resolution is 1920×1080, frame rate matches your expectation, and bitrate sits within roughly 10% of your target setting. Variable bitrate encoding means the number won't match exactly.
Play a 30-second segment on your destination platform. Upload a short clip to YouTube as unlisted, to the client review tool, or to whatever the delivery destination is. Confirm playback at 1080p quality in the player. This catches container/codec mismatches that file properties don't show — for example, a file that says it's H.264 inside MP4 but uses an unusual pixel format the platform rejects.
Now for video conversion troubleshooting — the five problems you're most likely to hit, and how to fix each one.
1. Conversion stalled at 45% and the tab froze. The cause is almost always file size exceeding available browser memory. Typical working memory per tab in Chrome and Edge is 2–4 GB. If this 1080p converter not working scenario hits you, refresh the tab, then do one of three things: lower the output bitrate by half, trim the source to a shorter clip first, or close other browser tabs to free memory. If the source is 4K or 8K, downscaling to 1080p actually reduces memory pressure during encoding because the output frames are smaller. If trimming the source is the simplest path, run it through a browser-based video trimmer first, then convert the shorter clip.
2. Output file says 1920×1080 but looks soft and pixelated. The source was below 1080p; you've upscaled, not converted. The dimensions are correct; the captured detail is not. The fix is to accept it (the file meets dimensional spec for platforms that require 1080p as a minimum) or re-shoot the source at 1080p or higher if that's possible. Browser FFmpeg cannot synthesize detail that wasn't recorded — and neither can any non-AI converter, cloud or local.
3. File downloaded but won't open in QuickTime or my client's player. This is a codec mismatch. You likely chose H.265 (HEVC) and the recipient's player only supports H.264. Re-convert with H.264 codec selected. H.264 plays in QuickTime, Windows Media Player, VLC, browser players, and virtually every editing tool ever made. Reserve H.265 for recipients who have confirmed support in writing.
4. Output bitrate is much lower than what I set. Variable bitrate (VBR) encoding adjusts based on scene complexity. Static content like interviews, slide presentations, or screen recordings of mostly-still pages ends up well below the target bitrate. This is correct behavior — VBR is saving file size without quality loss by recognizing that simple frames don't need the full bitrate budget. Only override this if the destination platform requires a specific minimum bitrate (some broadcast specs and certain ad networks do). Otherwise, the visual quality matches the target you set even though the average bitrate is lower.
5. Conversion finished but no audio in the output. Audio codec selection mismatched with the container, or the source had a non-standard audio stream the converter couldn't read. Re-run the conversion with audio codec set to AAC and audio bitrate at 128–192 kbps. AAC inside MP4 is the universal combination and plays everywhere. If the issue persists, the source file may have multiple audio streams and the converter selected the wrong one — try isolating the desired audio track with a browser-based audio cutter first, then convert.
Once you've done one successful 1080p conversion with verified output, the process becomes a 60-second routine: load, set 1920×1080, choose 6 Mbps H.264, convert, verify dimensions, deliver. The settings stay the same for nearly every deliverable, and the only variable is source size.